

WhatsApp Health Status & Troubleshooting
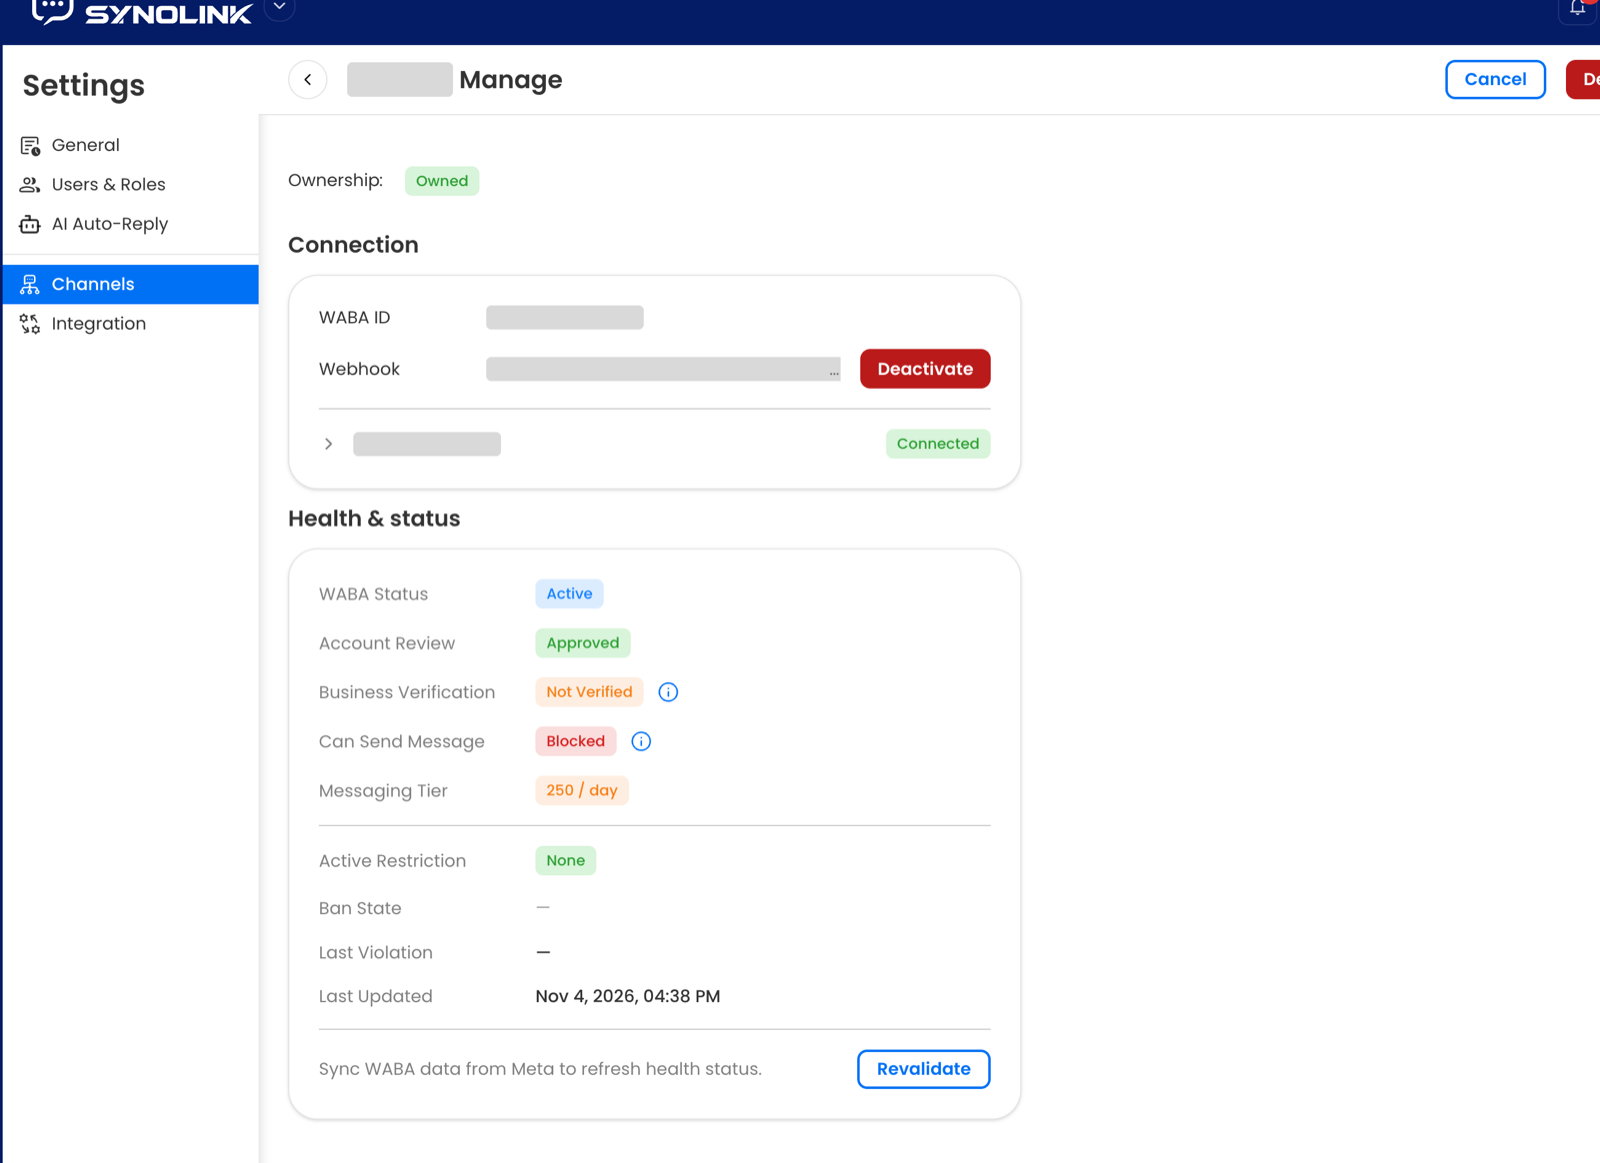
If messages are not going out after connecting WhatsApp, open the channel management page and check Health & status to find the cause. The ⓘ icon next to a status chip shows the reason Meta reports and links to the matching section of this guide.
Status Fields
Section titled “Status Fields”| Field | Meaning |
|---|---|
| WABA Status | Status of the WhatsApp Business account. Active is normal. |
| Account Review | Result of Meta’s account review. Approved is normal. |
| Business Verification | Whether the business is verified. Shows Verified or Not Verified. |
| Can Send Message | Meta’s verdict on whether this account can send messages. One of Available, Limited, or Blocked; what exactly is blocked depends on the reason. |
| Messaging Tier | How many business-initiated conversations (templates, broadcasts) the number can start in a 24-hour period, e.g. 250 / day. Conversations that customers start do not count against it. |
| Active Restriction | Whether Meta has placed a restriction on the account. None is normal. |
| Ban State · Last Violation | Whether the account is banned and the most recent policy violation. Empty is normal. |
| Last Updated | When the status was last synced from Meta. |
Can Send Message Values
Section titled “Can Send Message Values”- Available – Messages can be sent normally.
- Limited – Messages can be sent, but with a reduced limit. Appears when business verification is incomplete or the display name is not yet approved.
- Blocked – Meta has stopped sending. When the cause is a missing payment method, only templates and broadcasts are blocked and replying to conversations that customers start still works. When the account is banned, all sending stops. The ⓘ icon shows which reason applies.
Causes of Blocked / Limited
Section titled “Causes of Blocked / Limited”Meta reports the reason, and it is almost always one of the following.
| Meta reason | Status | Fix |
|---|---|---|
| No payment method (error code 141006) | Blocked | Add a payment method |
| Business not verified (error code 141010) | Limited | Verify your business |
| Account banned (error code 141014) | Blocked | Check the reason and appeal in Meta Business Support Home |
Payment methods and business verification are handled in Meta Business Suite (business.facebook.com). If a missing payment method is what blocks sending, add one first. For a ban, use the Open in Meta link under the ⓘ icon to reach Business Support Home and appeal.
Add a Payment Method
Section titled “Add a Payment Method”Step 1: Open Billing & payments
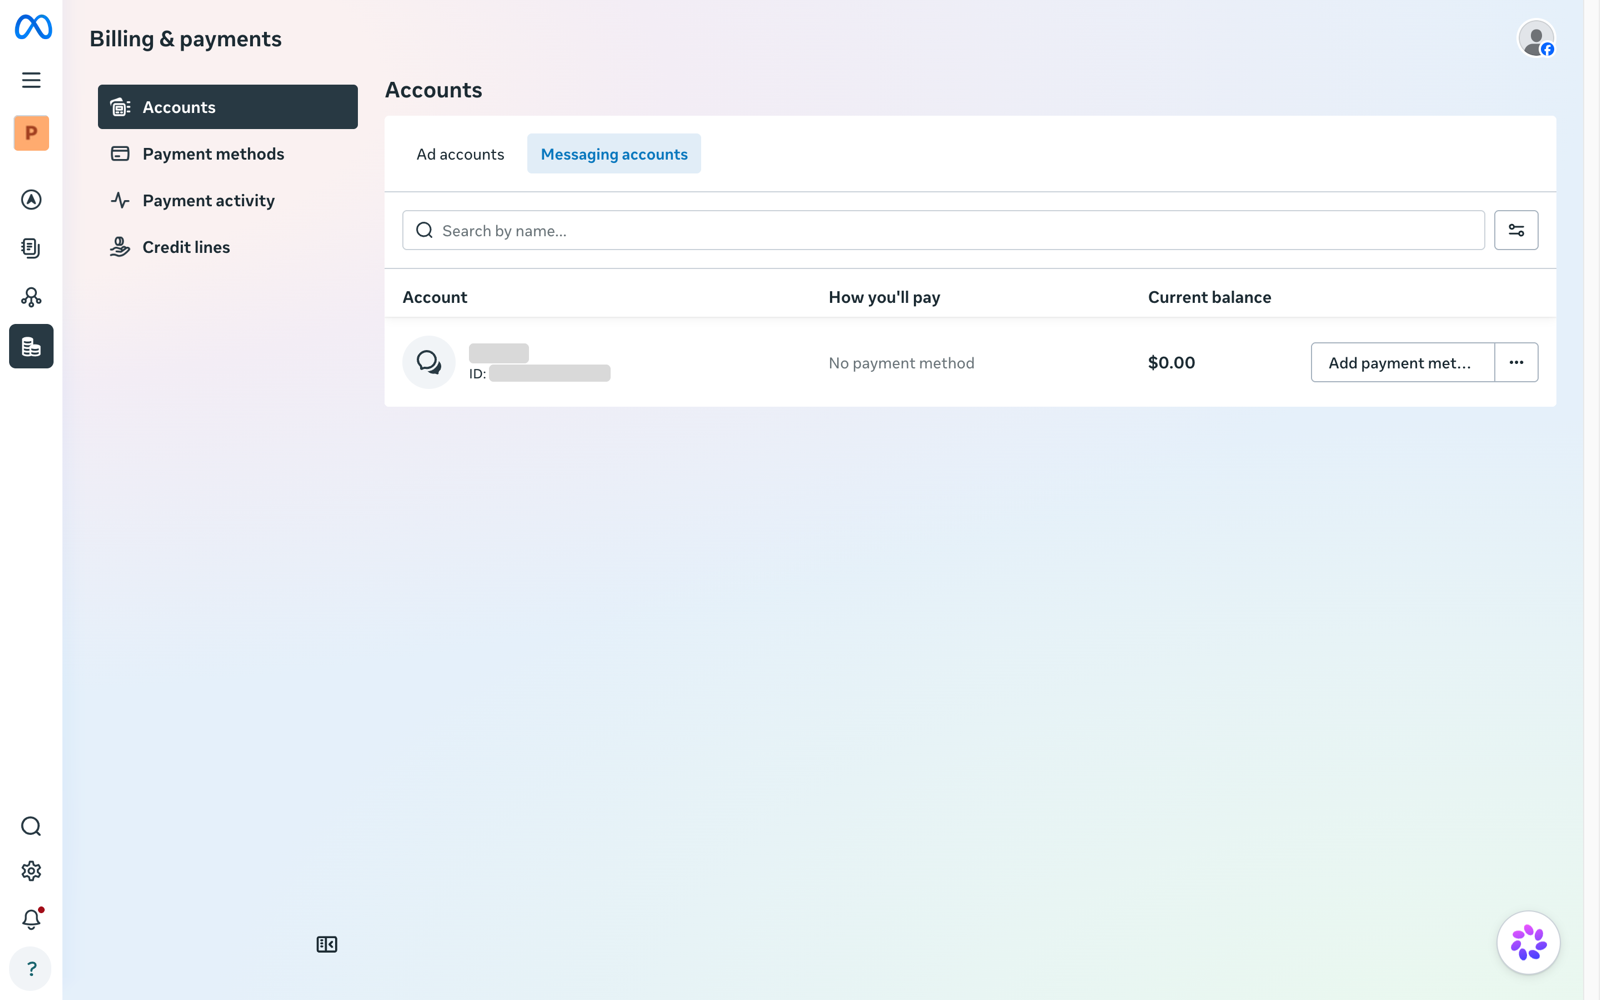
Section titled “Step 1: Open Billing & payments”- Log in to Meta Business Suite
- Select Billing & payments in the left menu (it is also at the bottom of the Settings menu)
- On the Accounts screen, select the Messaging accounts tab
- Find the WhatsApp account that shows No payment method in the How you’ll pay column
Step 2: Add the payment method
Section titled “Step 2: Add the payment method”- Click Add payment method on that account’s row
- Check Business location and currency, and use Edit if it is wrong
- Select Debit or credit card and click Next
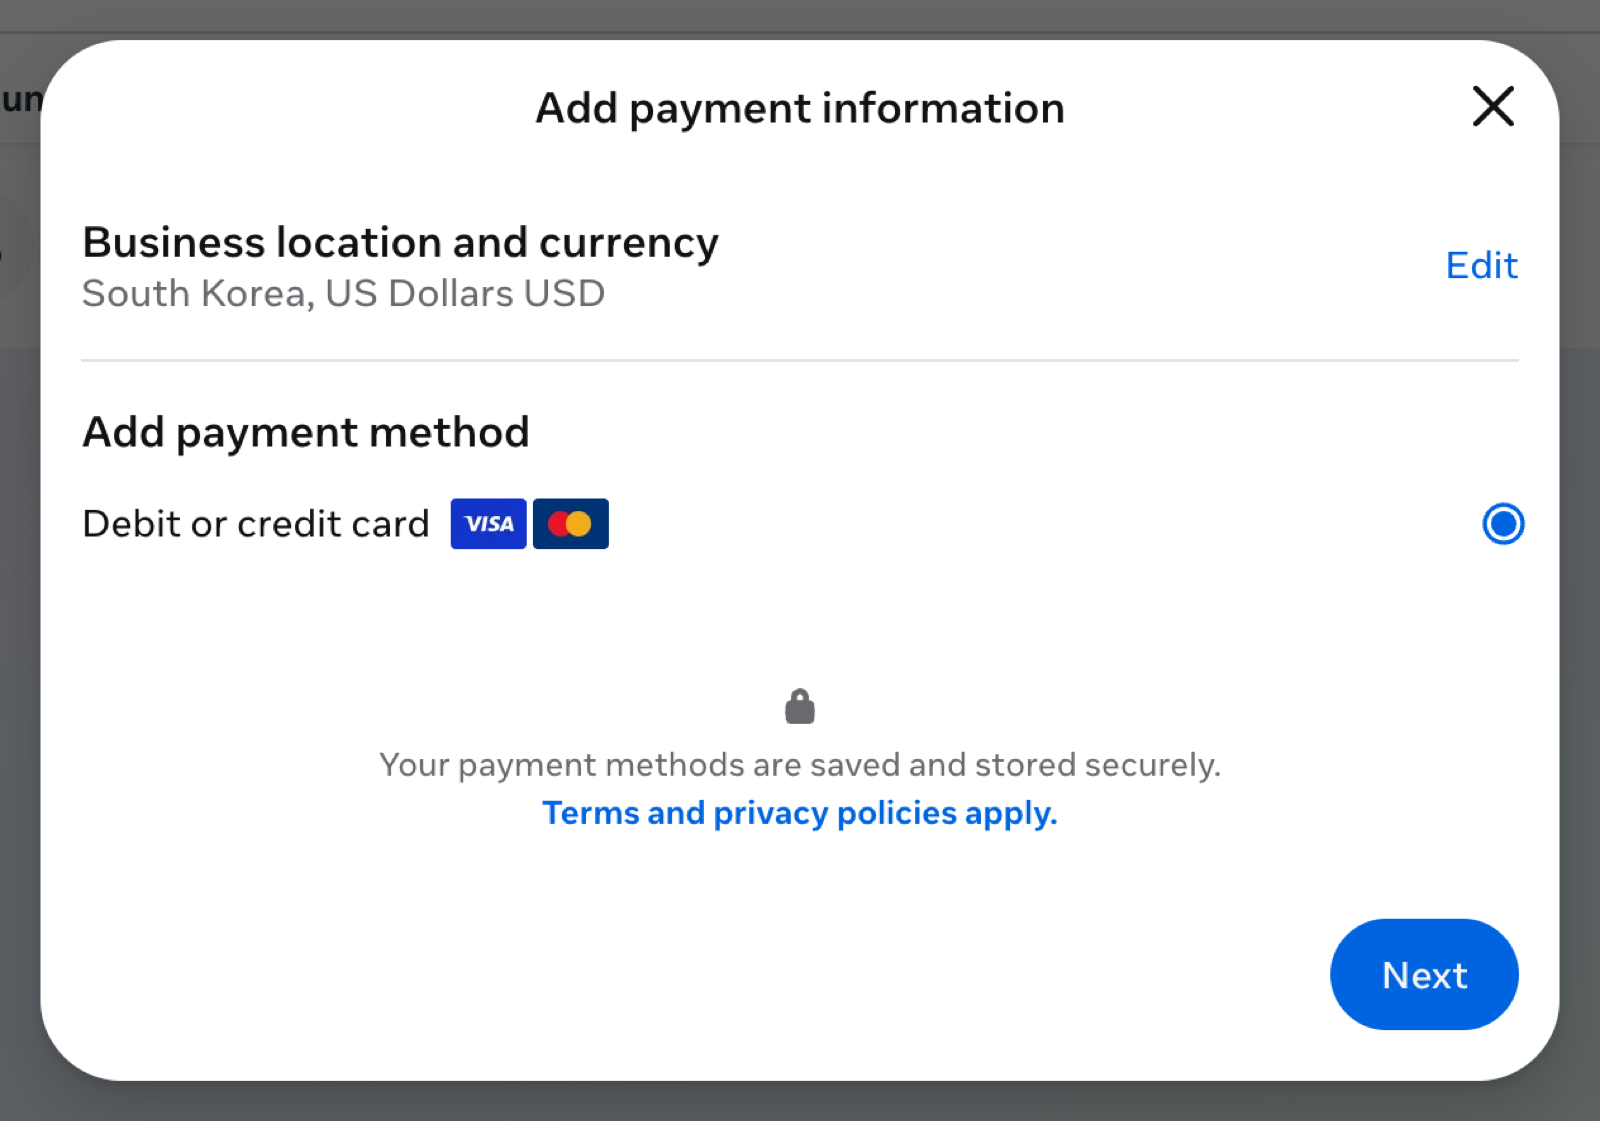
- Meta states that location and currency cannot be changed once set, so confirm them before continuing
- Enter your card details on the next screen and save
Step 3: Confirm the change
Section titled “Step 3: Confirm the change”- It can take some time for Meta to apply the payment method
- Click Revalidate on the SynoLink channel management page to refresh the status
- You are done when Can Send Message changes to Available or Limited
Verify Your Business
Section titled “Verify Your Business”Step 1: Open the Security Center
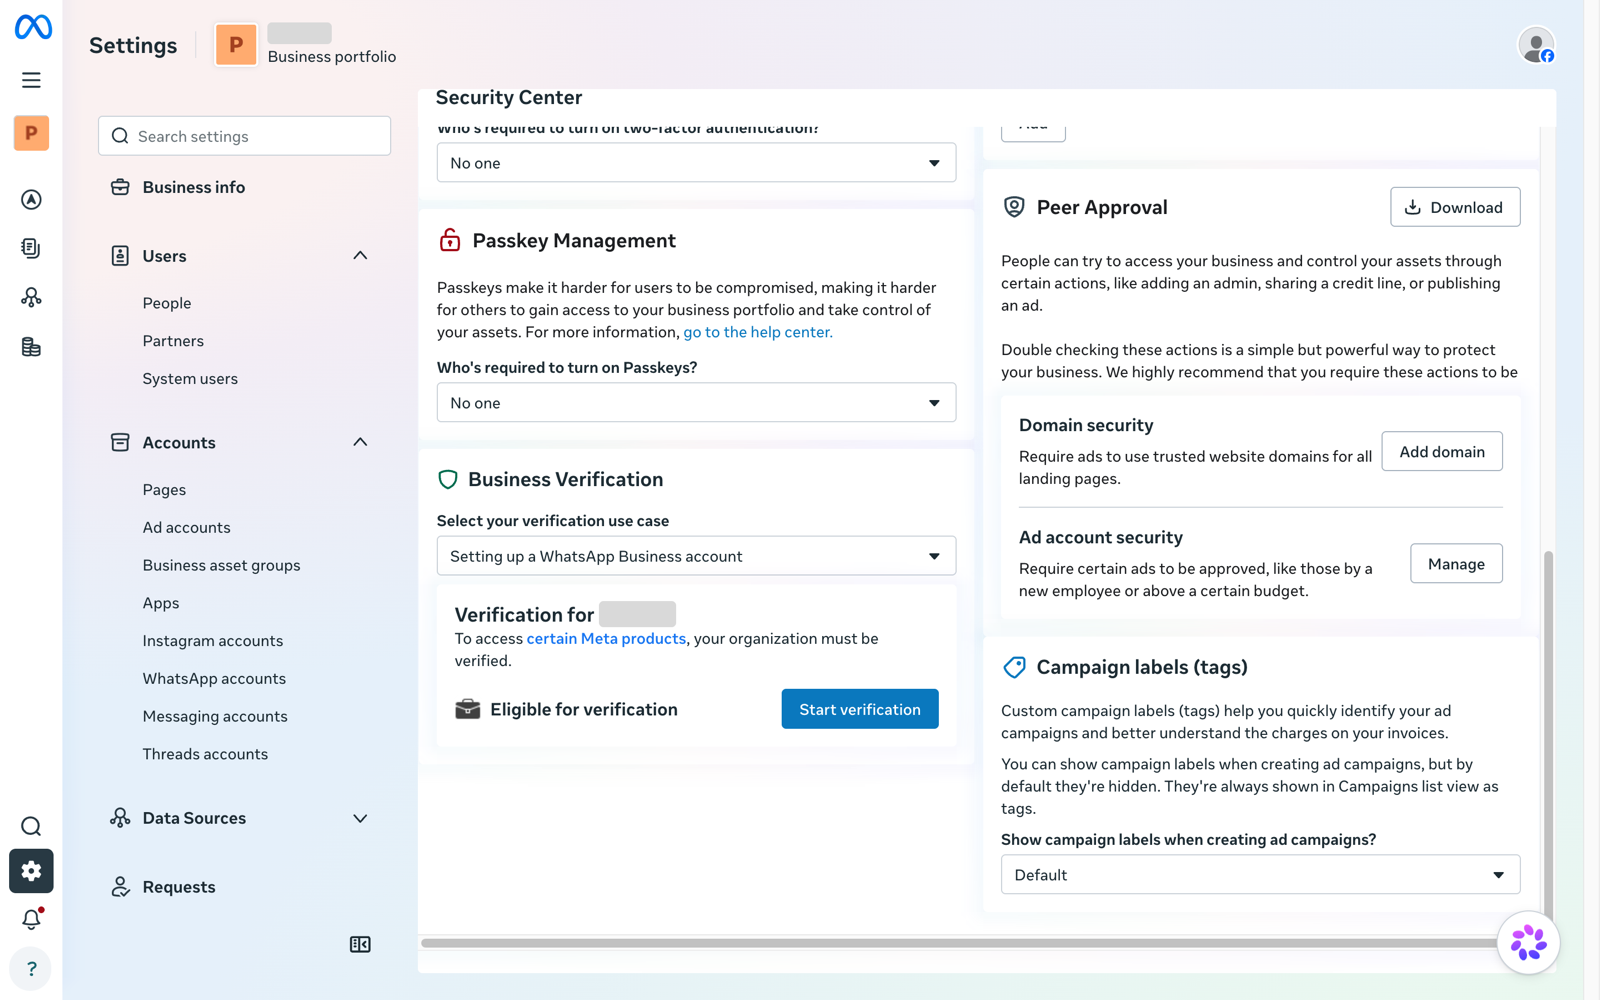
Section titled “Step 1: Open the Security Center”- Go to Settings in Meta Business Suite
- Select Security Center near the bottom of the left menu
- Scroll down to the Business Verification section
- Set Select your verification use case to Setting up a WhatsApp Business account
- Click Start verification
Step 2: Review what’s involved
Section titled “Step 2: Review what’s involved”- Review the required items (business details, contact confirmation, document upload) and click Get started
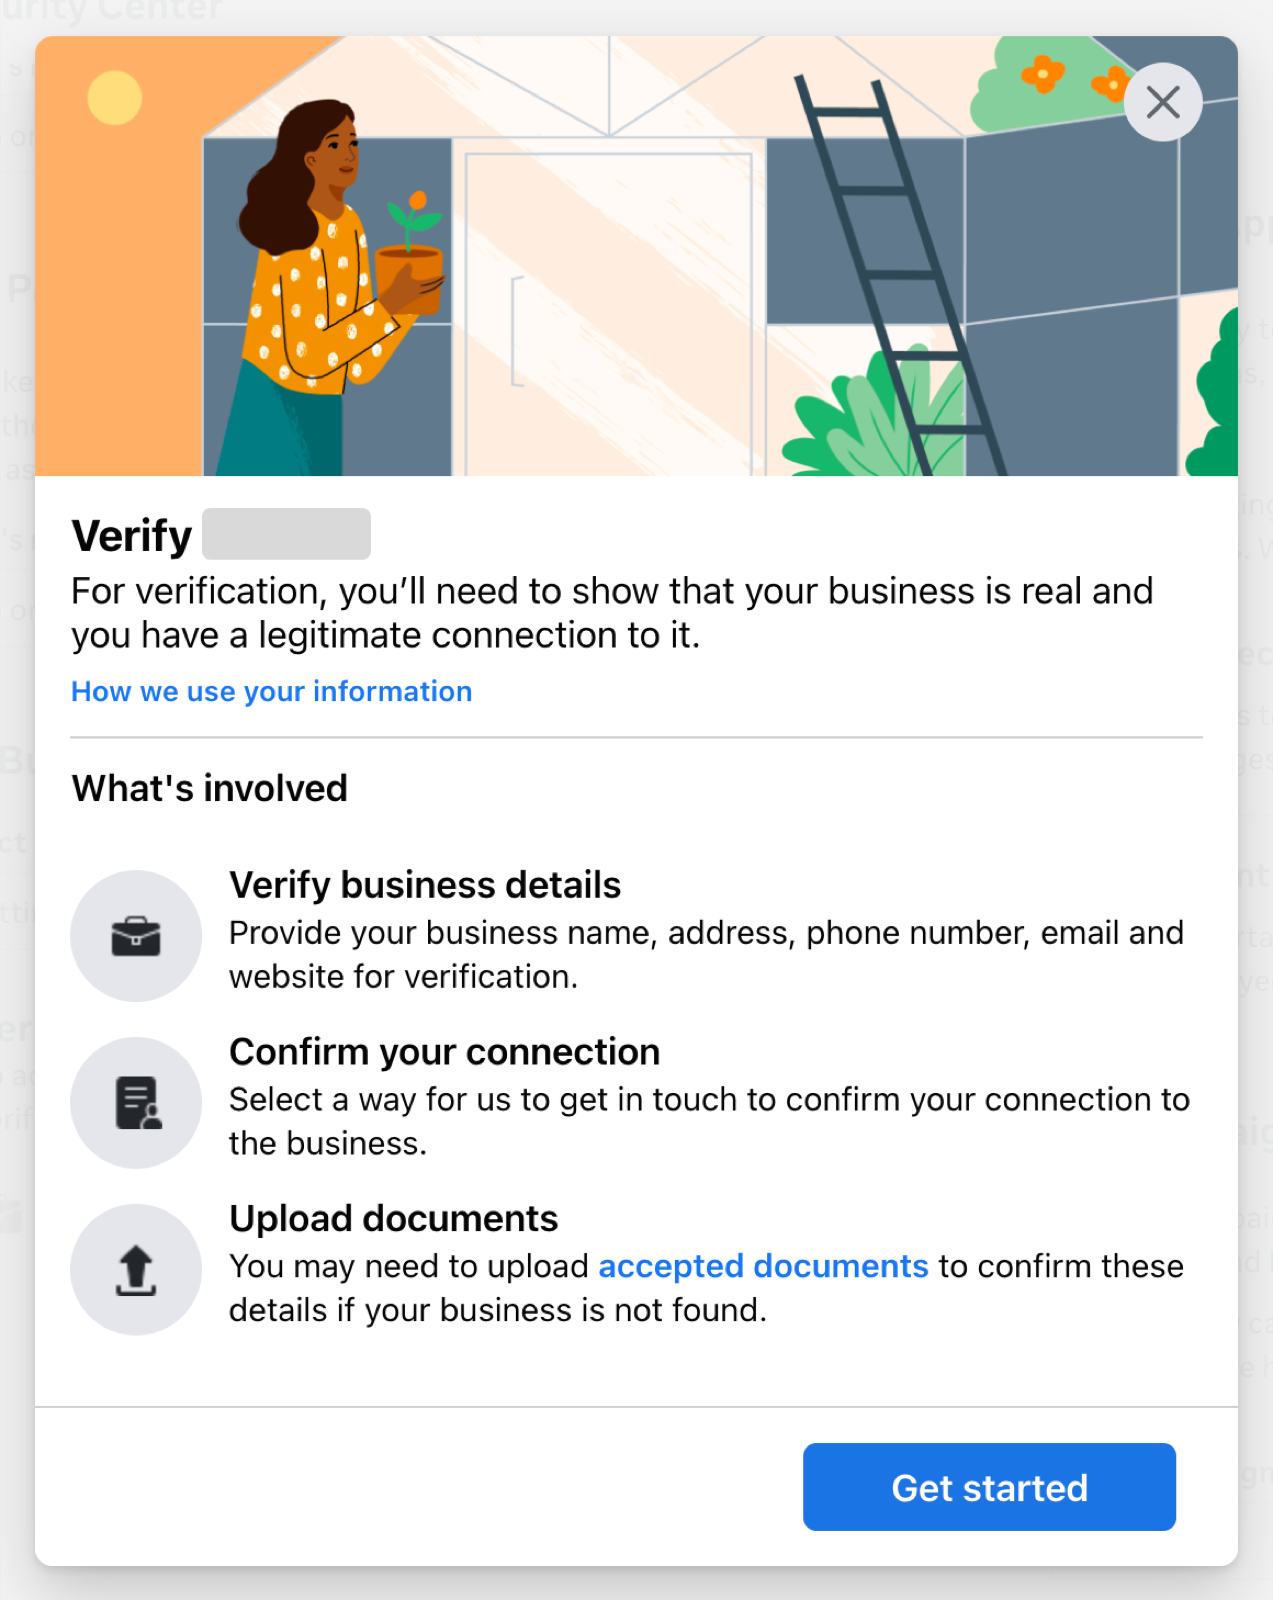
Step 3: Select country and business type
Section titled “Step 3: Select country and business type”- Select the country where the business is located and click Next
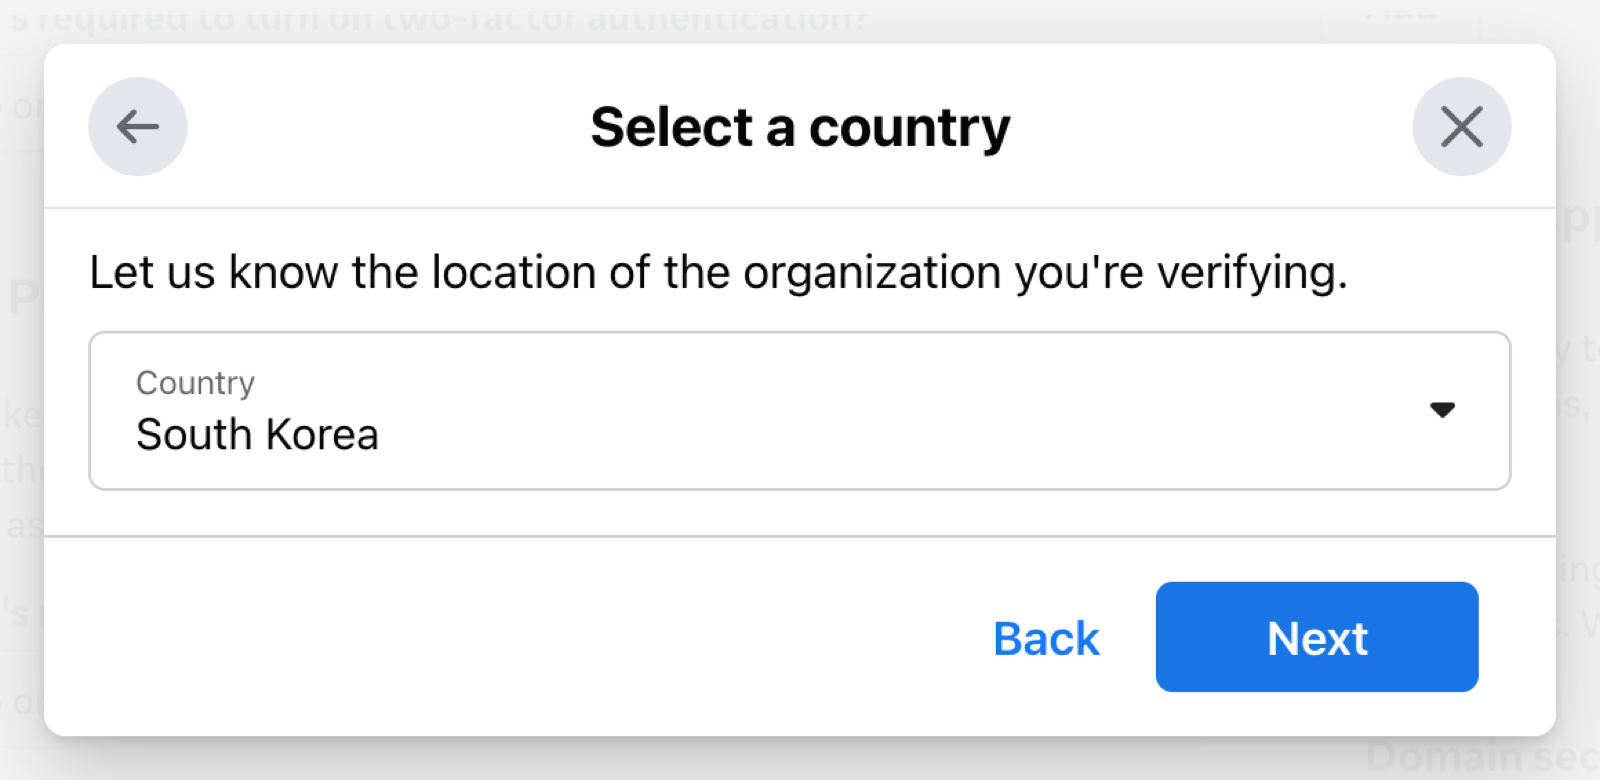
- Select the business type. Hospitals and medical institutions should choose Institution
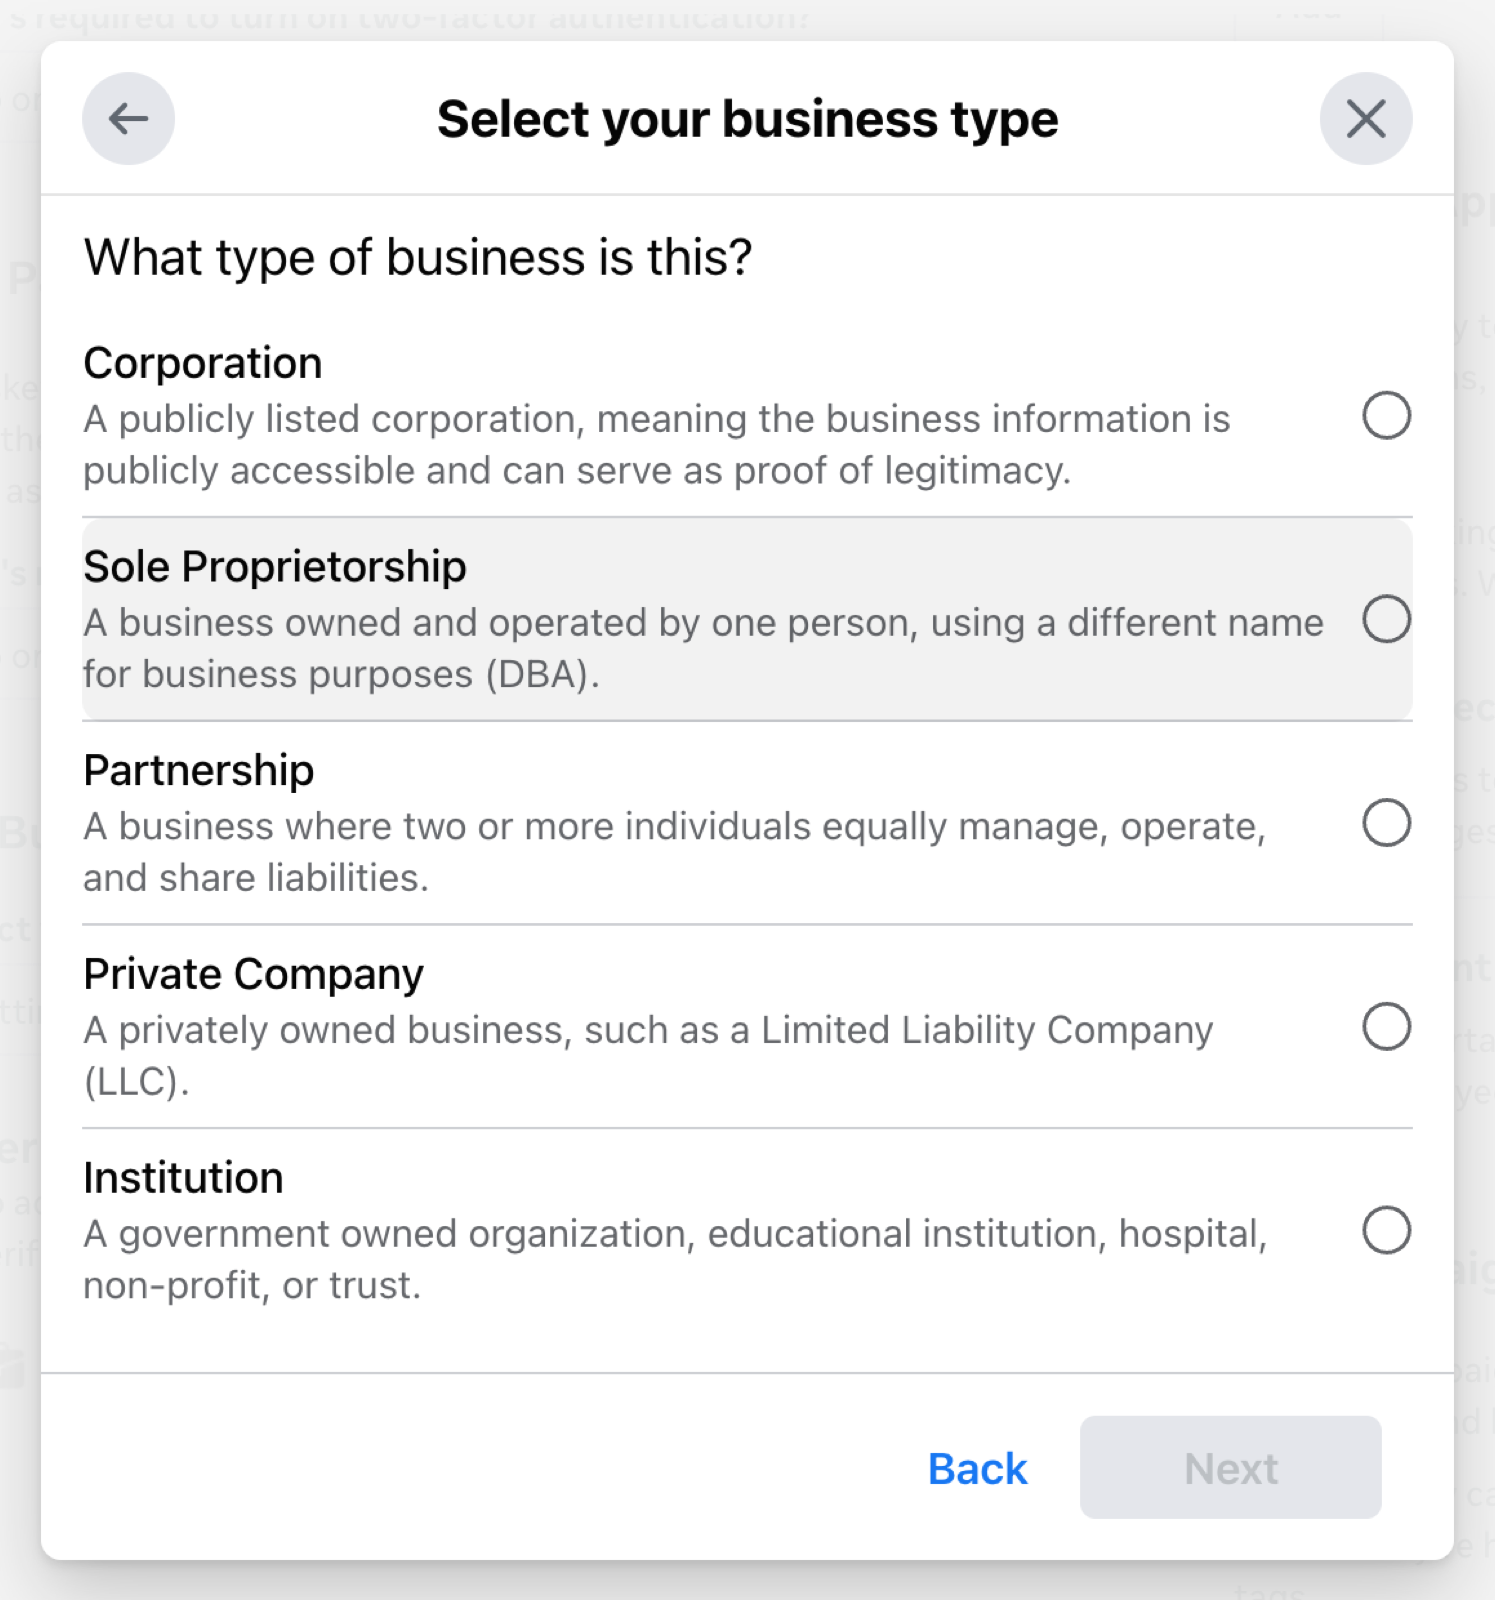
Step 4: Enter business details
Section titled “Step 4: Enter business details”- Enter the business registration number (optional) and the business name. The name must match your official documents
- On the following screens, enter the address, phone number, email, and website, then choose how Meta should confirm your connection
- If the business is not found in official records, upload documents such as a business registration certificate
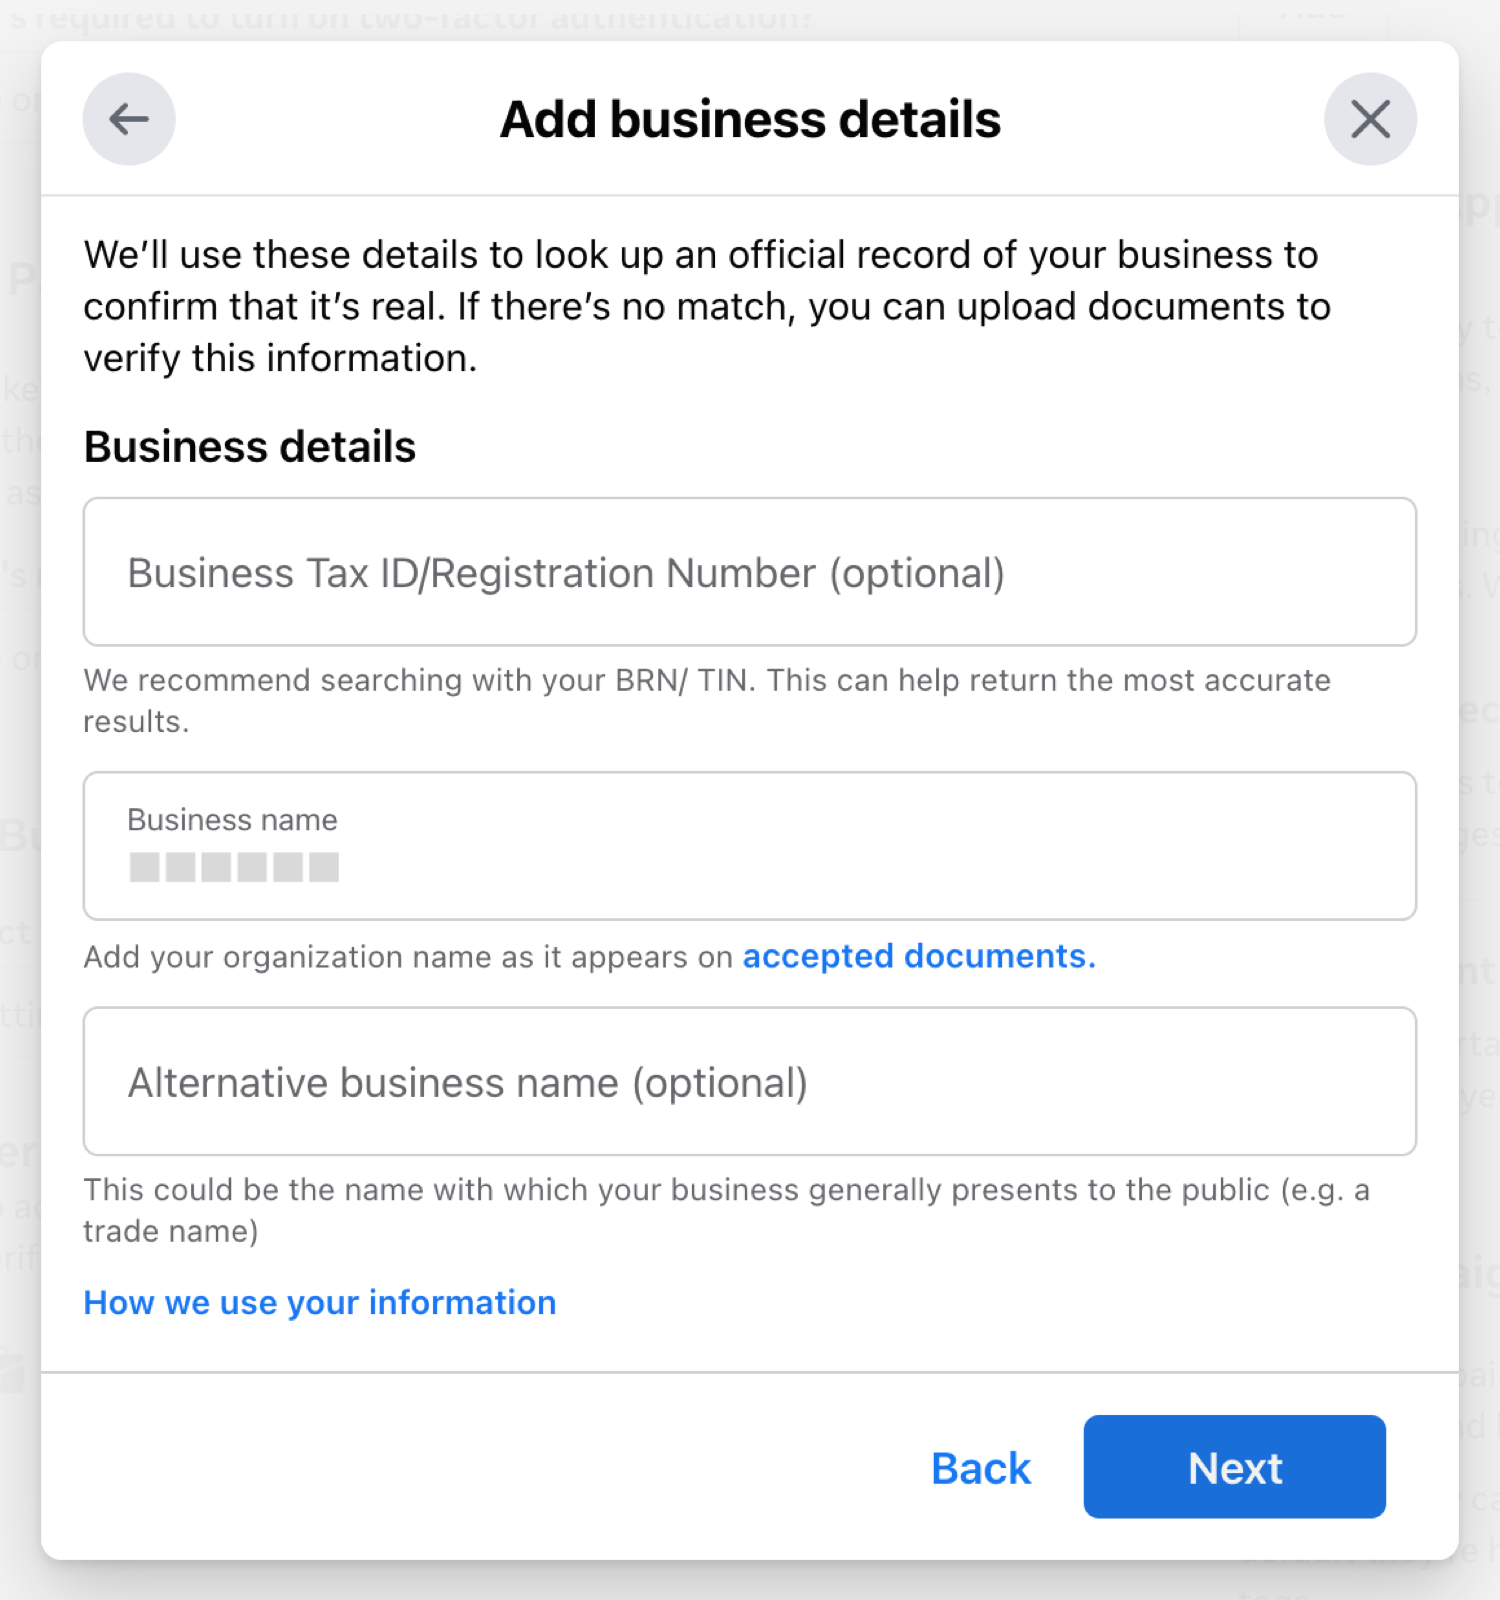
Step 5: Check the result
Section titled “Step 5: Check the result”- The review result is shown in the Business Verification section of the Security Center
- After approval, click Revalidate on the SynoLink channel management page and Business Verification changes to Verified
Still Not Working?
Section titled “Still Not Working?”- Click Revalidate on the channel management page and check that the Last Updated time changes
- Changes on Meta’s side can take time to apply, so check again later if the status has not changed yet