

WhatsApp Quick Connect
Quick Connect
Section titled “Quick Connect”Step 1: Authorize with Facebook
Section titled “Step 1: Authorize with Facebook”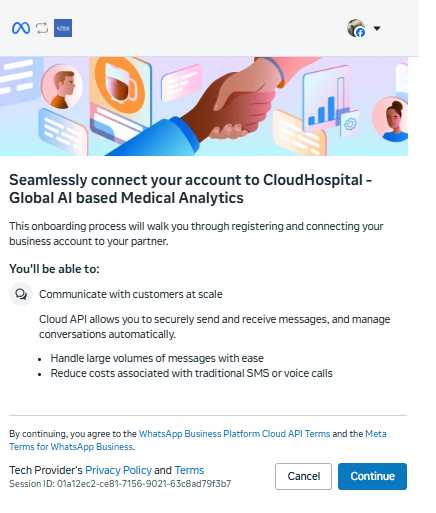
A Meta/Facebook dialog will appear to connect your account with SynoLink.
Review the information and terms, then click Continue.
What you’re authorizing:
- Communication with customers at scale
- Secure sending and receiving of messages through SynoLink
- Management of WhatsApp conversations through SynoLink
Step 2: Add Your WhatsApp Phone Number
Section titled “Step 2: Add Your WhatsApp Phone Number”Choose the phone number that will be used to send and receive WhatsApp messages.
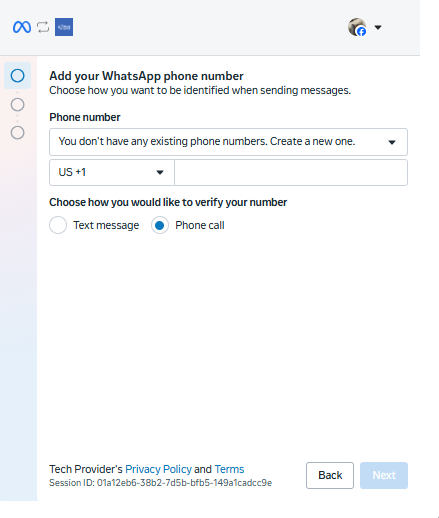
- Select an existing phone number, or choose You don’t have any existing phone numbers. Create a new one.
- Select the country code and enter your phone number.
- Choose a verification method:Text message****Phone call
- Click Next.
Verify Phone Number
Section titled “Verify Phone Number”Enter the 6-digit verification code sent by text message or phone call.
Note: The verification code expires after 10 minutes. Request a new code if needed.
Step 3: Select Business Portfolio & WhatsApp Business Account
Section titled “Step 3: Select Business Portfolio & WhatsApp Business Account”Select the business assets you want to share with SynoLink.
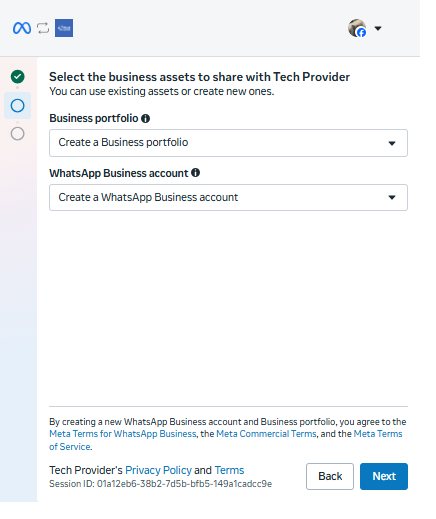
- In the Business portfolio dropdown, select an existing business portfolio or choose Create a Business portfolio.
- In the WhatsApp Business account dropdown, select an existing account or choose Create a WhatsApp Business account.
- Click Next.
Step 4: Enter Business Information
Section titled “Step 4: Enter Business Information”Enter the information for your new WhatsApp Business assets.
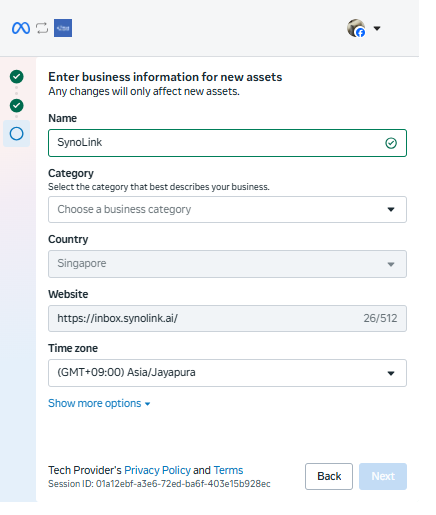
- Enter your business name.
- Select a business category.
- Confirm your country.
- Enter your website.
- Select your time zone.
- Use Show more options if additional business details are required.
- Click Next.
Step 5: Confirm and Complete Setup
Section titled “Step 5: Confirm and Complete Setup”Review the displayed terms and permissions, then complete the remaining Meta prompts.
Once setup is complete, the system will begin loading and automatically configure the webhook connection.
Sync Webhook
Section titled “Sync Webhook”Final Step: Configure Webhook Connection
Section titled “Final Step: Configure Webhook Connection”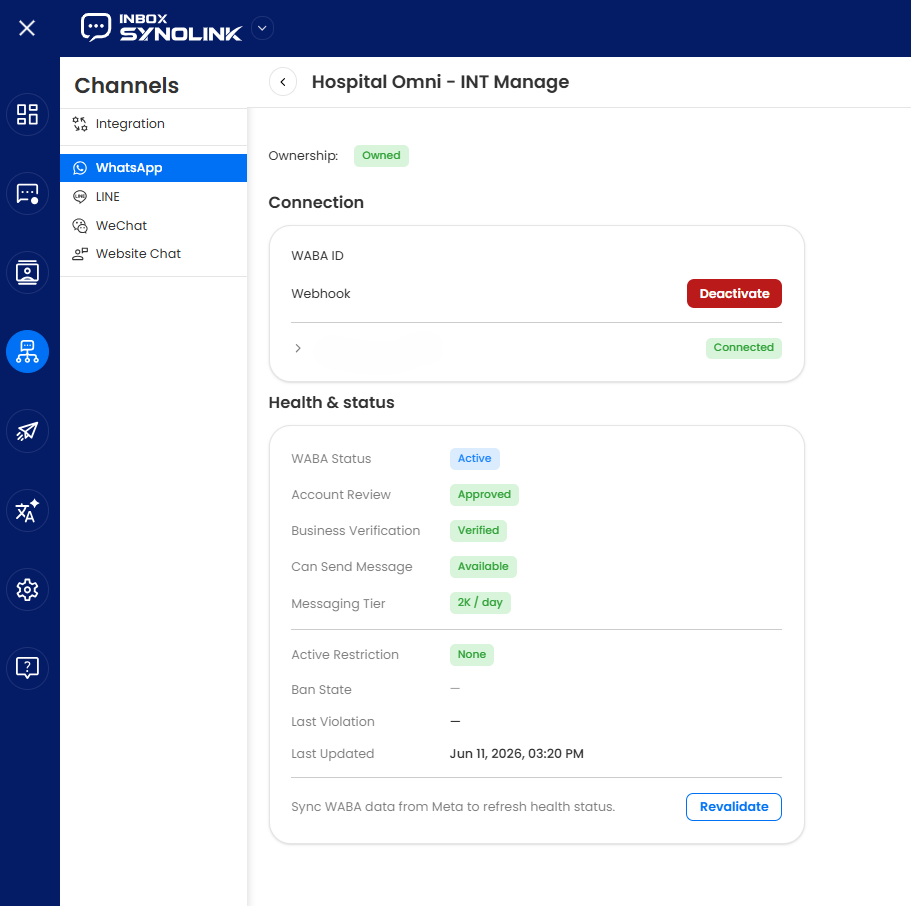
After completing Quick Connect or Advanced Setup, you’ll return to the SynoLink platform.
- Your WhatsApp account will appear in the WhatsApp List.
- The webhook connection will be configured automatically.
- Click Manage to check your WhatsApp account settings.
- Verify that the Webhook Health status shows Configured ✓.
Congratulations! Your WhatsApp Business account is now fully integrated and ready to receive messages. No manual webhook configuration is required.